Do more with the Hue Dimmer Switch (or any switch) in HomeKit!
This will be the first of many tips about how you can get more out of your Hue Dimmer Switch. I’m going to talk about the Hue Dimmer Switch, but this is true for any HomeKit compatible light switch. If you can set it up in HomeKit, you should be able to do this.
At this point it’s important to understand that for this to work, you need to choose to configure it in the Apple Home app when you pair your Hue Dimmer Switch in the Hue app. If you’ve already configured it in the Hue app, you’ll just need to go to Settings in the Hue app, Accessory setup, choose the correct Hue Dimmer Switch, and click Configure in Apple Home app at the bottom. If the Hue Dimmer Switch is configured in both the Hue App and the Apple Home app, it would not work properly.
Since this is the first post, I’ll go through the steps in the Apple Home app to get going. I’ll be explaining all the steps. In later posts I’ll be referencing back to this one.
In our bedroom, we’ve got two Louis Poulsen table lamps where smart bulbs can’t fit. To be able to control these lights through HomeKit, I’ve connected them to a Hue Smart Plug. But instead of choosing one button on the Hue Dimmer Switch to turn them on, and another one to turn them off, I’ll now show you how you can get one button to toggle between on and off for these lights. Let’s start by pressing Add on Button 1 – Single Press (Picture 1).
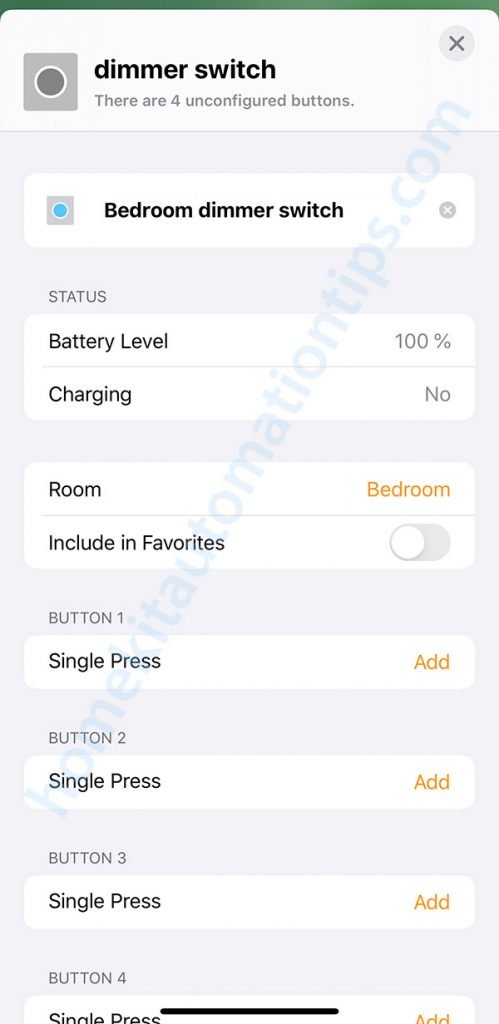
Picture 1
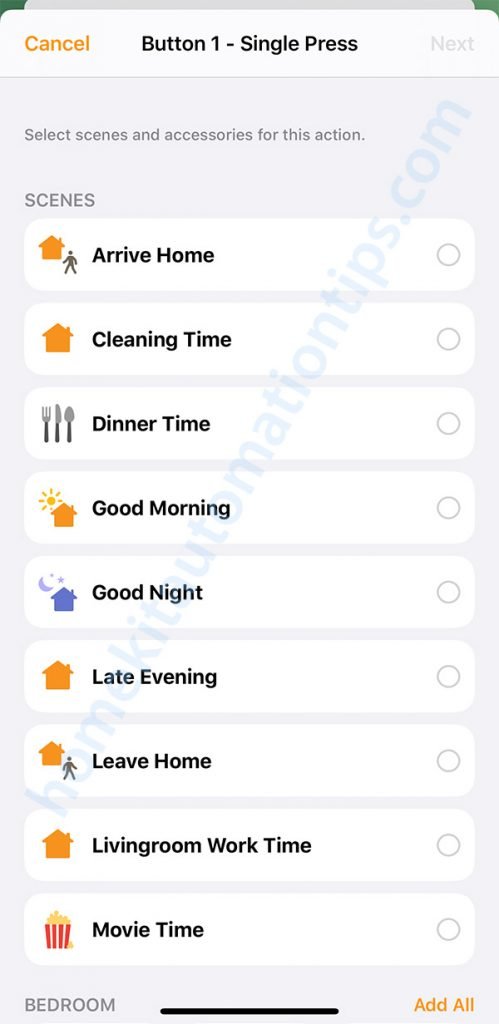
Picture 2
You’re now presented with the option to map the button to a HomeKit scene or a HomeKit device like lamps, TVs, etc (Picture 2). If you scroll all the way down you will get the Advanced option to Convert To Shortcut (Picture 3).
This will get you to the Shortcut pane (Picture 4). It will have added a Control Home action which you can remove (by clicking on the x in the corner).
We’ll now start by adding an action. Either press + Add Action or click in the Search for apps and actions at the bottom. I think the quickest way to find the right app or action is to start typing. Let’s start with the If statement.
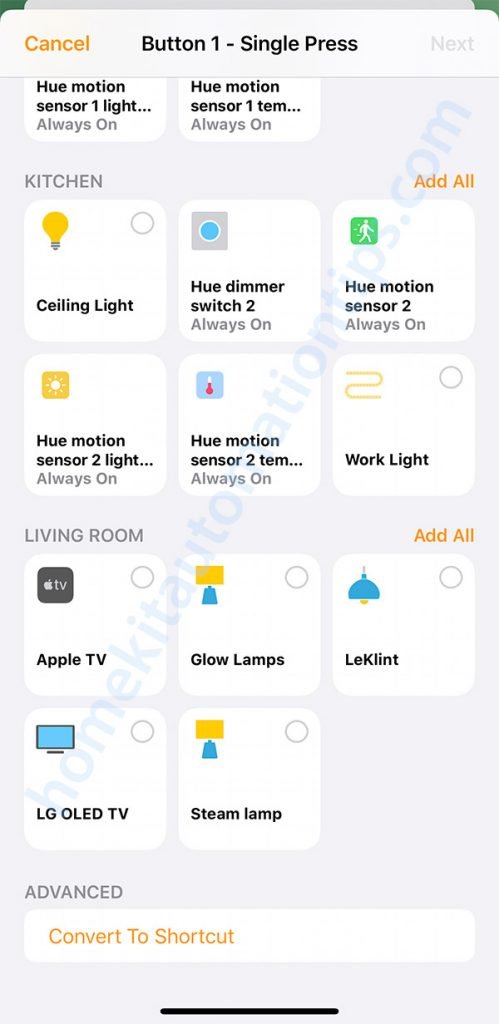
Picture 3
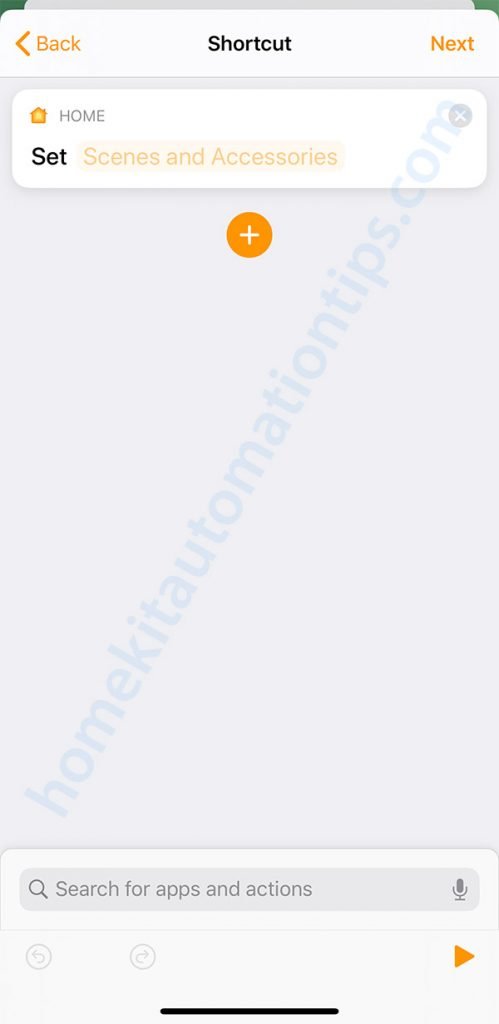
Picture 4
Press the orange Input in the If statement, and then Select a Home Accessory, and then choose which lamp you want to control, and then Done in the top right corner.
Now press the + or Search for apps and actions and find the Control Home action. Then set Scenes and Accessories and choose the same lamp as you did before. Be sure that it says Turn on or a percentage larger than 0%. If it’s a lamp that you can dim, you can long press the icon to change the brightness. If it’s a lamp that can change color, this is where you change the color as well. When you’re happy with the brightness and color press done.
The action Set will now be below the End If statement. If you long press it, and keep your finger on it, you’re able to move it. Move it between the If and the Otherwise.
Now create another Control Home action and again choose the same lamp. This time you want to make sure that the lamp you’ve chosen is set to Turn off or 0%. The action will again appear below the End If statement. Long press and move it between Otherwise and End if. The end result should look like Picture 5, but with your lamp’s name. You can test the shortcut by pressing the orange play button (bottom right). If it works, press Next in the top right corner and then Done. Congrats you’ve created a “toggle light on and off” shortcut.
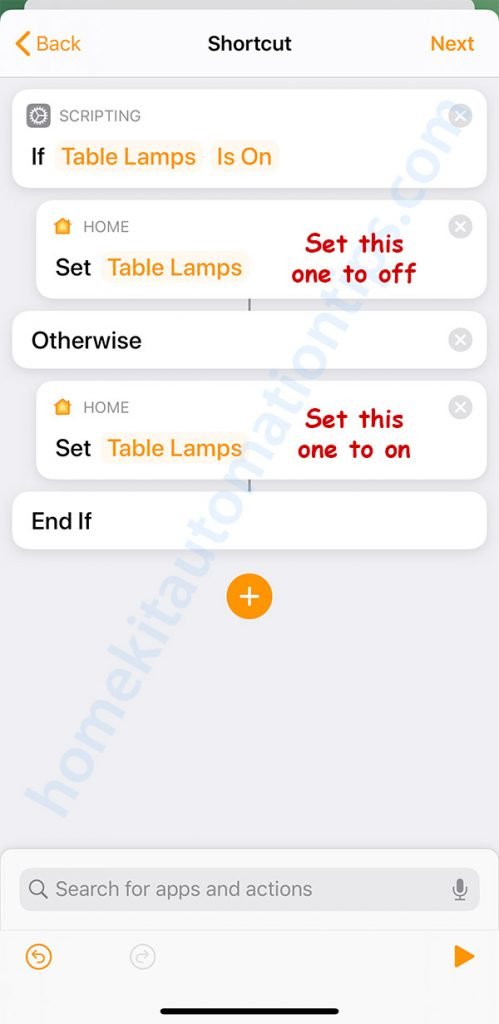
Picture 5
You can now do the same for the other 3 buttons on the Hue Dimmer Switch to control more lamps in your home. In the next posts in the Hue Dimmer Switch series, we’ll look at other more advanced shortcuts that you can use together with your Hue Dimmer Switch (or any HomeKit switch).
This was super helpful. Thank you.
Hi Scott,
Thank you for the feedback 🙂 It’s always nice to hear.