When you get into HomeKit accessories, you’ll probably get a few smart switches or buttons to control your lights and other devices so that you don’t have to use your voice or phone every time you want to turn on a light. You also have the idea that this will make everything more spouse and family friendly.
However, after these buttons and switches are scattered all around your home, and you’ve mapped different buttons to run very different actions (perhaps some buttons toggle specific lights on and off, while other toggle lights of whole rooms or scenes… and then some just run specific shortcuts), you might start having a hard time keeping it all in your head… and you might start getting feedback from the spouse or the rest of the family.
Advertisements
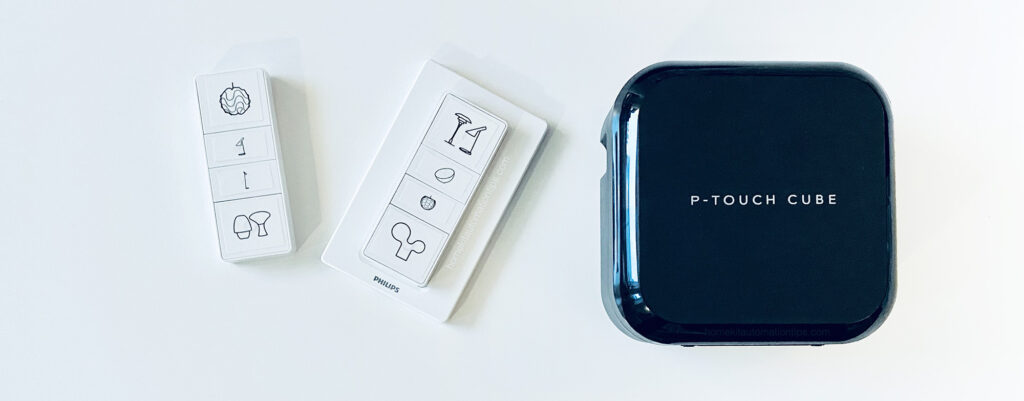
Our solution was to create icons for the different lights and shortcuts in Photoshop and get a fancy label printer (in our case the Brother P-Touch Cube Plus / PT-P710BT) that can also print images.
The results? Well, it’s perhaps not perfect, but a huge improvement. If you take your time and don’t rush, you can even get the labels perfectly straight on. I was in a bit of a hurry, or perhaps I’m just not that good with crafts.
The Brother P-Touch Cube Plus label printer works with both 24mm and 12mm width labels, which is perfect for the Hue Dimmer Switches.
This post is NOT sponsored or affiliated in any way to Brother (or any other company).
Advertisements
7 thoughts on “Using a label printer to customize your HomeKit compatible switches and buttons”
Brian
Can’t believe I never thought of this before! We use emoji stickers, which work pretty well except 1) there’s only one sticker per emoji in every pack and 2) there isn’t always the right emoji for the corresponding button action. We may need to get one of these. Great idea!
Yes, I created them in Photoshop. The easiest way was to find photos of the lamps, open them up in Photoshop, and then trace the lines on a new layer 🙂
Writing you 3 years from the future.
Ingenious Idea.
Thank you!
Check your label widths towards the end of the article. You stated” …Cube Plus label printer works with both 2.4mm and 1.2mm width labels…” Youre off by a factor of 10. The Cube Plus is capable of up to ~1” (24mm).
You are absolutely right. Thank you for correcting. And sorry for it taking so long for me to reply. Your comment was in the middle of hundreds of spam comments.

Can’t believe I never thought of this before! We use emoji stickers, which work pretty well except 1) there’s only one sticker per emoji in every pack and 2) there isn’t always the right emoji for the corresponding button action. We may need to get one of these. Great idea!
Hi there,
This is amazing! I just bought the P-touch cube plus and want to do this.
Did you create the images you used?
Trying to figure out if there is a source for these somewhere.
Yes, I created them in Photoshop. The easiest way was to find photos of the lamps, open them up in Photoshop, and then trace the lines on a new layer 🙂
I have used this site to create some of my labels
https://thenounproject.com/search/icons/?iconspage=1&q=schedule
That looks like a good resource for labels! 🙂
Writing you 3 years from the future.
Ingenious Idea.
Thank you!
Check your label widths towards the end of the article. You stated” …Cube Plus label printer works with both 2.4mm and 1.2mm width labels…” Youre off by a factor of 10. The Cube Plus is capable of up to ~1” (24mm).
You are absolutely right. Thank you for correcting. And sorry for it taking so long for me to reply. Your comment was in the middle of hundreds of spam comments.